Learning how to apply PBR textures in Blender is essential for creating photorealistic materials that respond accurately to lighting conditions. This comprehensive Blender tutorial will guide you through the complete process of setting up physically-based rendering materials using proper shader node workflows. Whether you’re working with architectural visualizations or game asset development, mastering PBR material creation in Blender will significantly enhance your 3D rendering quality.
Setting Up Your Blender Workspace for PBR Materials
Before diving into PBR texture application, configuring your Blender workspace optimally will streamline your material creation process. Switch to the Shading workspace by clicking the Shading tab at the top of Blender’s interface. This workspace provides direct access to the Shader Editor, which is crucial for building complex PBR materials with multiple texture maps.
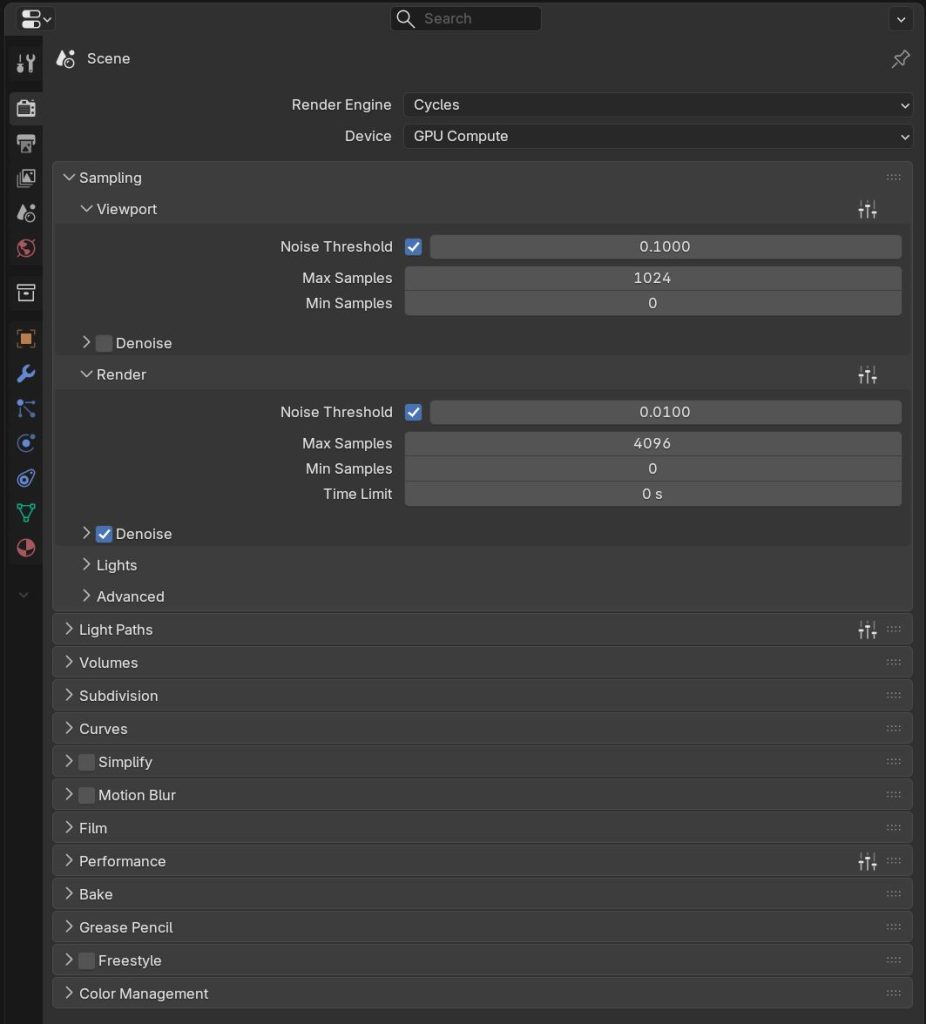
Set your render engine to Cycles in the Render Properties panel, as it provides superior PBR material support compared to the default Eevee renderer. While Eevee offers faster preview rendering, Cycles delivers more accurate physically-based lighting calculations that showcase PBR materials properly. Enable GPU acceleration in Preferences > System if you have a compatible graphics card to speed up both viewport rendering and final renders.
Configure your viewport shading to Material Preview or Rendered mode to see real-time feedback of your PBR materials. The Material Preview mode uses studio lighting that highlights material properties effectively, while Rendered mode shows your materials under the actual scene lighting conditions. For optimal texture preview quality, ensure your viewport texture resolution is set to high quality in the Shading panel of the Sidebar.
Understanding PBR Texture Map Types and Their Functions
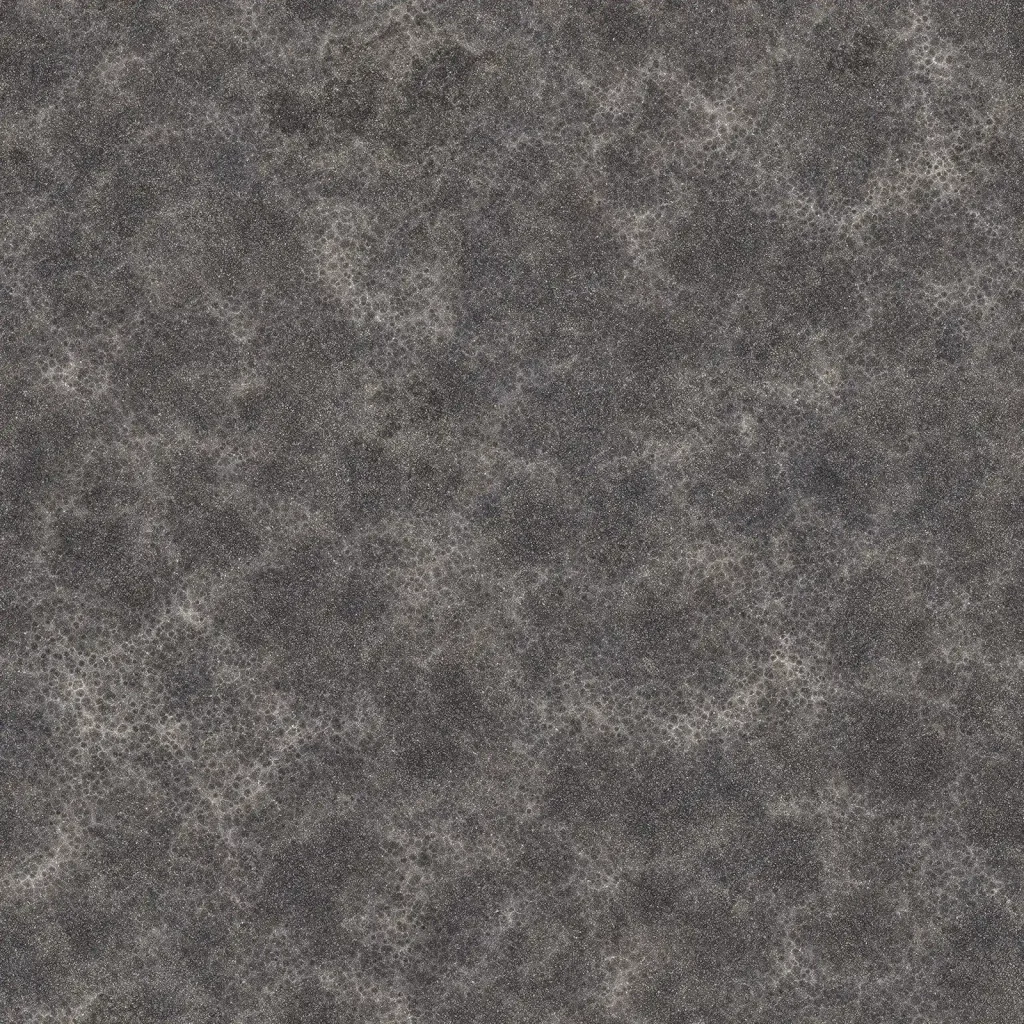
Professional PBR workflows rely on multiple texture maps working together to simulate realistic material properties. The Albedo map (also called Diffuse or Base Color) defines the surface color without any lighting information, representing how the material would appear under perfectly even white light. High-quality albedo textures from CGAxis PBR materials typically range from 2K to 8K resolution, providing exceptional detail for close-up renders.
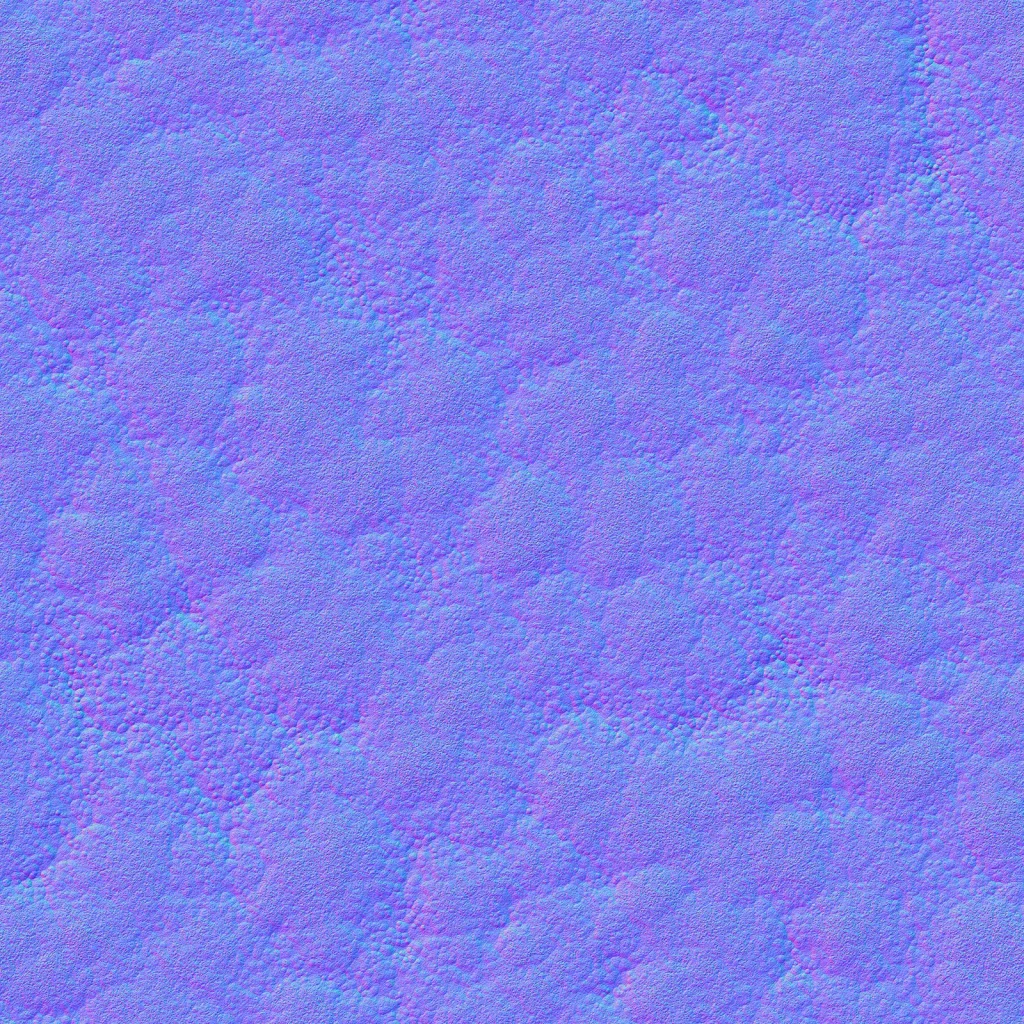
The Normal map creates the illusion of surface detail by manipulating how light bounces off the surface, adding depth without increasing polygon count. Roughness maps control surface microsurface variation, with black values representing mirror-like surfaces and white values indicating completely rough, matte surfaces. This map is crucial for controlling reflections and specular highlights realistically.
Metallic maps distinguish between metallic and non-metallic materials using binary values – pure black for dielectric materials like wood or fabric, and pure white for metals like steel or aluminum. Some PBR workflows also include Height maps for displacement effects, Ambient Occlusion maps for enhanced depth, and Specular maps for fine-tuning reflectance values in specific rendering engines.
Creating Your First PBR Material with Shader Nodes
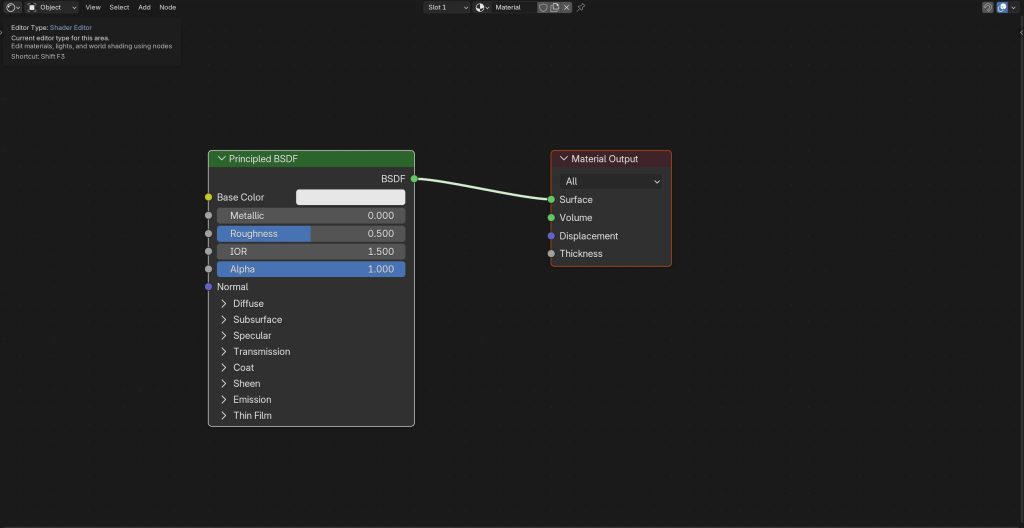
Start by selecting your 3D object and creating a new material in the Material Properties panel. Click “New” to generate a default material, which automatically includes a Principled BSDF shader node connected to the Material Output. The Principled BSDF serves as the foundation for PBR materials in Blender, containing all the inputs necessary for physically-accurate material creation.
Adding Image Texture Nodes for Each PBR Map
In the Shader Editor, press Shift+A to add new nodes, then navigate to Texture > Image Texture. You’ll need separate Image Texture nodes for each PBR map – typically Albedo, Normal, Roughness, and Metallic. Load your texture files by clicking the folder icon in each Image Texture node and selecting the corresponding map file. Ensure your texture files are properly named (e.g., Material_Albedo.jpg, Material_Normal.jpg) for easy identification.
Connect the Color output of your Albedo texture directly to the Base Color input of the Principled BSDF. For the Normal map, you must add a Normal Map node (Add > Vector > Normal Map) between the Image Texture and the Normal input of the Principled BSDF. This node properly interprets the normal map data and converts it to the vector format Blender requires.
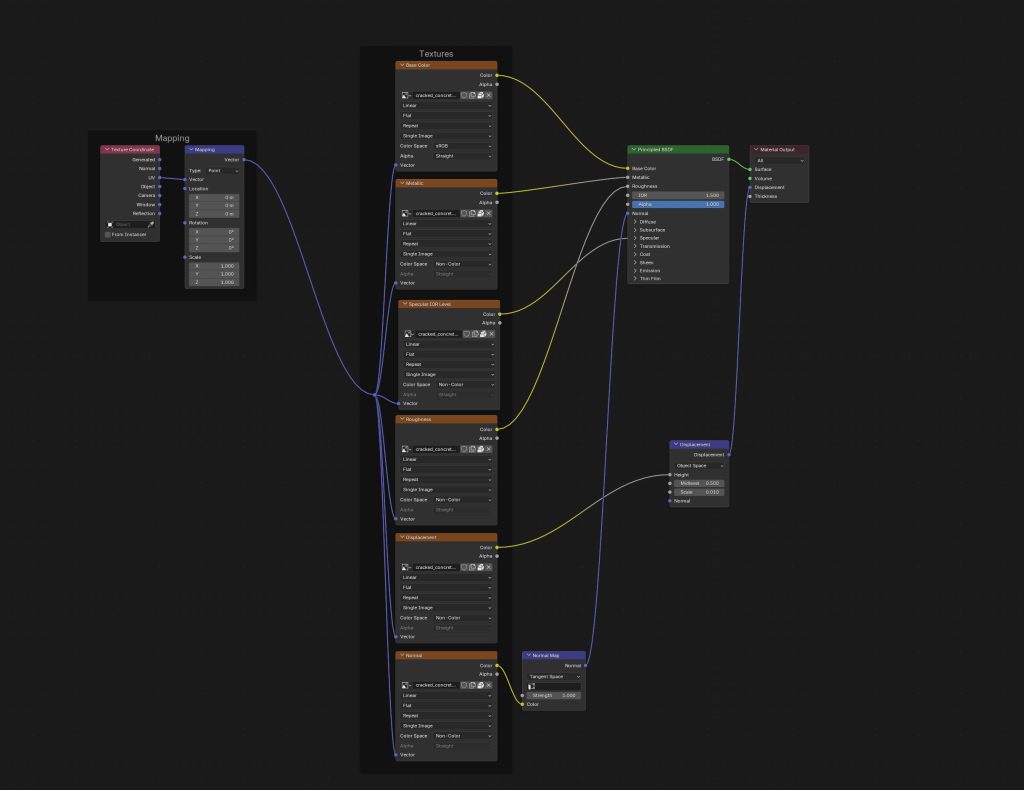
Configuring Metallic and Roughness Connections
Connect your Roughness texture’s Color output directly to the Roughness input of the Principled BSDF. For grayscale maps like roughness and metallic, you can also use the Alpha output instead of Color for slightly better performance. The Metallic map connects similarly – Color output to Metallic input on the Principled BSDF.
Set the Color Space for your Normal, Roughness, and Metallic maps to “Non-Color” in their respective Image Texture nodes. Only the Albedo map should remain in sRGB color space, as it contains actual color information. This correct color space assignment prevents Blender from applying incorrect gamma correction to data-based texture maps.
Fine-Tuning PBR Material Properties for Realistic Results
After connecting your basic PBR maps, several parameters on the Principled BSDF require adjustment for optimal results. The Specular value typically works best at 0.5 for most dielectric materials, though you may need to adjust this based on your specific material type. For metals, the Specular value can often be reduced to 0.0 since metals derive their reflectance primarily from the Metallic parameter.
IOR (Index of Refraction) settings significantly impact how your materials interact with light. Common IOR values include 1.45 for glass, 1.33 for water, and 1.5 for most plastics. When working with architectural materials like wood or concrete, an IOR of 1.45 typically produces realistic results.
The Subsurface Scattering parameters become crucial when working with organic materials like skin, wax, or marble. Even subtle subsurface values (0.1-0.3) can add significant realism to materials that traditionally appear flat with standard PBR setups. Adjust the Subsurface Radius values to control how far light penetrates into the material – red values affect the deepest penetration, while blue values control surface scattering.
UV Mapping Considerations for PBR Textures
Proper UV unwrapping becomes critical when applying PBR textures, as all maps must align perfectly for convincing results. Use Blender’s UV Editing workspace to ensure your UV layout provides adequate resolution for your texture detail level. A 4K texture applied to poorly unwrapped UVs with significant distortion will look worse than a 1K texture on clean, well-proportioned UV coordinates.
Consider texture tiling requirements when UV unwrapping objects like floors, walls, or repetitive surfaces. Seamless PBR textures perform best when UVs are scaled appropriately – typically 2-4 texture repeats per meter for materials like wood flooring or brick walls. Test your UV scaling in the Shader Editor by adjusting the Mapping node scale values to find the optimal texture-to-geometry ratio.
Advanced PBR Techniques and Node Group Optimization
Professional PBR workflows often require additional nodes for enhanced realism. Add a ColorRamp node between your Roughness texture and the Principled BSDF to fine-tune roughness distribution – this allows you to compress or expand the roughness range without editing the original texture. Similarly, a ColorRamp on the Metallic connection can help clean up metallic maps that contain gray values instead of pure black and white.
Create node groups for frequently used PBR setups to maintain consistency across your projects. Select all nodes related to a single PBR material setup, press Ctrl+G to create a group, then customize the group’s inputs and outputs. This approach proves especially valuable when working with complex materials that include dirt overlays, wear patterns, or procedural variation.
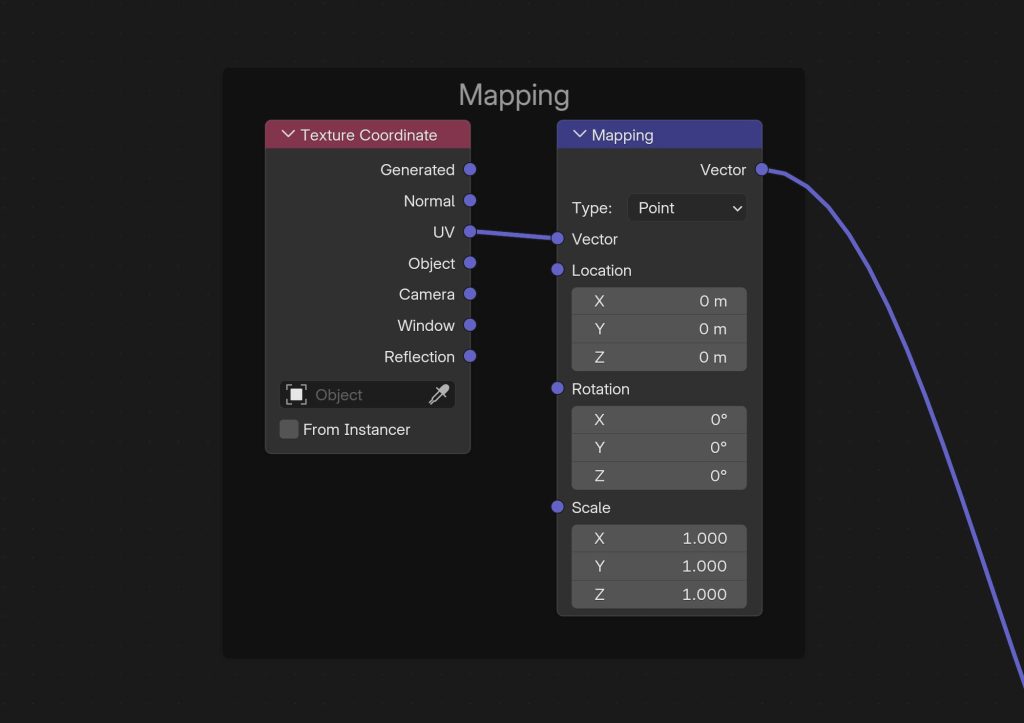
Texture coordinate management becomes crucial for large scenes or detailed objects. Add a Texture Coordinate node and Mapping node before your Image Texture nodes to gain precise control over texture placement, rotation, and scaling. Use Object coordinates for textures that should stick to the object regardless of UV changes, or Generated coordinates for procedural placement on primitive shapes.
Rendering and Output Optimization for PBR Materials
PBR materials require appropriate lighting conditions to showcase their properties effectively. HDRI environment lighting provides the most accurate results, as it supplies the full spectrum of lighting directions and intensities that PBR materials expect. CGAxis HDRI maps offer studio and outdoor lighting setups specifically calibrated for PBR material evaluation.
Render sampling settings significantly impact PBR material quality and render times. For final renders, use at least 128-256 samples in Cycles, with Denoising enabled to maintain clean results. The new OptiX or OpenImageDenoise features in recent Blender versions can dramatically reduce noise in PBR renders without sacrificing detail quality.
Color management plays a crucial role in PBR workflows. Ensure your Color Management is set to Filmic in Render Properties for accurate color reproduction. The AgX color transform, available in newer Blender versions, often provides even better results for PBR materials with high dynamic range lighting conditions.
Troubleshooting Common PBR Material Issues
Incorrect color spaces represent the most frequent PBR material problem. If your materials appear overly bright, contrast, or colorful, verify that Normal, Roughness, and Metallic maps use Non-Color space while Albedo maps remain in sRGB. This issue becomes particularly apparent when using high-resolution textures, where incorrect color space interpretation can completely destroy material realism.
Texture resolution mismatches can cause obvious seams or quality inconsistencies between different PBR maps. Ensure all maps for a single material use identical resolutions – mixing 2K albedo with 4K normal maps often creates more problems than benefits. If you need higher detail in specific maps, upscale the lower-resolution maps using appropriate interpolation methods rather than mixing resolutions.
UV seam visibility increases with PBR materials due to their lighting sensitivity. Use Blender’s “Correct Face Attributes” option during UV unwrapping to minimize seam artifacts. For persistent seam issues, paint out seams in texture painting mode or use the Clone brush to manually correct problem areas across all PBR maps simultaneously.
Performance issues with high-resolution PBR textures can slow viewport navigation and increase render times significantly. Enable GPU texture memory optimization in Cycles settings, and consider using Blender’s new USD workflow for very large scenes with multiple 4K-8K PBR materials. The Geometry Nodes system also provides efficient methods for applying PBR materials to multiple objects without duplicating texture data.
Conclusion
Mastering PBR texture application in Blender requires understanding both the technical aspects of shader node connections and the artistic principles of physically-based rendering. The workflow covered in this tutorial provides a solid foundation for creating professional-quality materials that respond realistically to lighting conditions. Remember that consistent color space management, proper UV unwrapping, and appropriate texture resolution matching are crucial for achieving convincing results.

For access to thousands of production-ready PBR materials optimized for Blender workflows, consider the CGAxis All-Access subscription. With over 12,600 assets including PBR textures up to 8K resolution, you’ll have everything needed to create stunning architectural visualizations, game assets, and product renders without the time-consuming process of creating materials from scratch.


